

Reports
A report saves metrics for the last completed day, week or month and compares them with the previous period of the same length. Generate it manually or receive it on a schedule.
Create a report
- Open Reports in a project and select Create report. In the general section, choose a project first.
- Enter a name and choose Day, Week or Month.
- Select Add group, choose a source or Combined data, then select metrics.
- Add other groups and project observations if needed.
- Configure scheduled delivery if required, then save the report.
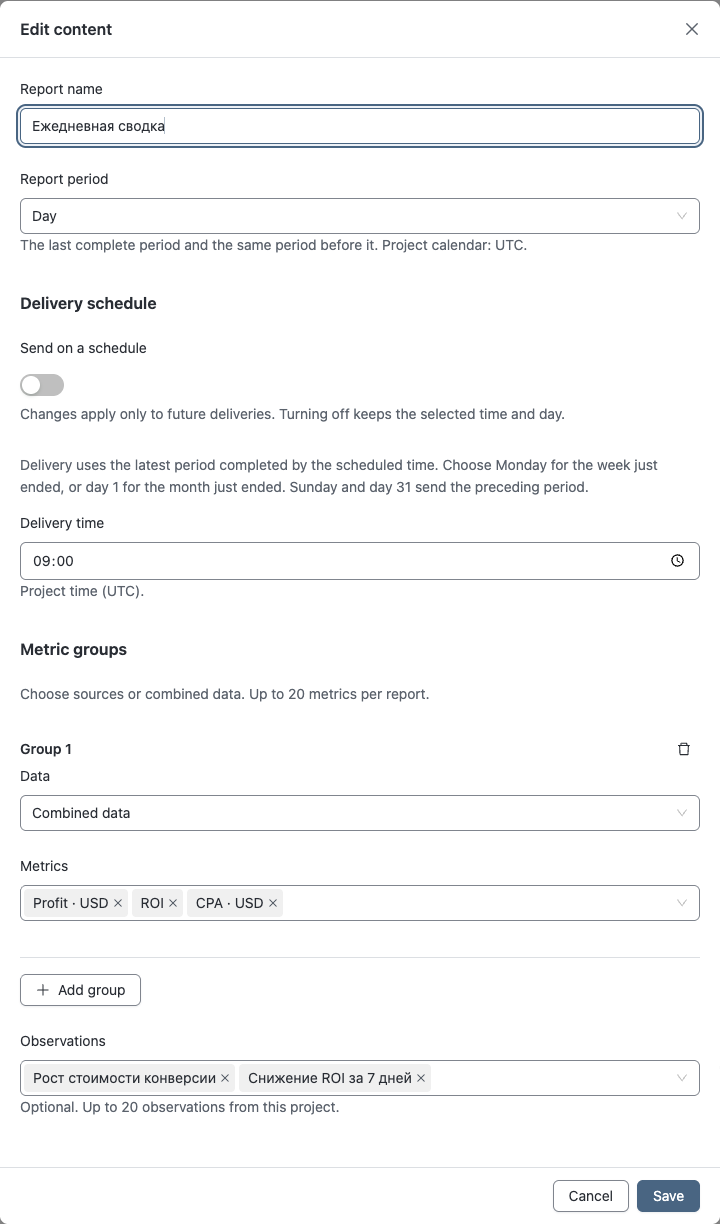
At least one metric is required. You can select up to 20 metrics and 20 observations. Do not add the same source as two separate groups. If you change a group's data, select its metrics again.
For combined data, the report does not use the dimension you selected on the Statistics or Monitoring page. Check the group's availability and its result after generation.
Find or edit a report
In the list, enter part of the name and submit the search. In the general section, you can also choose a project. Search covers all available reports rather than just the current page.
In the card, select Edit content to change metrics and observations. New settings apply to the next generation; earlier results stay unchanged. If an observation becomes unavailable, explicitly remove it from the report.
To rename a report, select its name, enter a new one and press Enter or move to another field. Escape cancels the edit.
Generate and read
- Select Generate report.
- Wait for completion or open the result later in Generation history.
- Check the report period, previous period and time zone.
- Review values, differences and data completeness messages for each group.
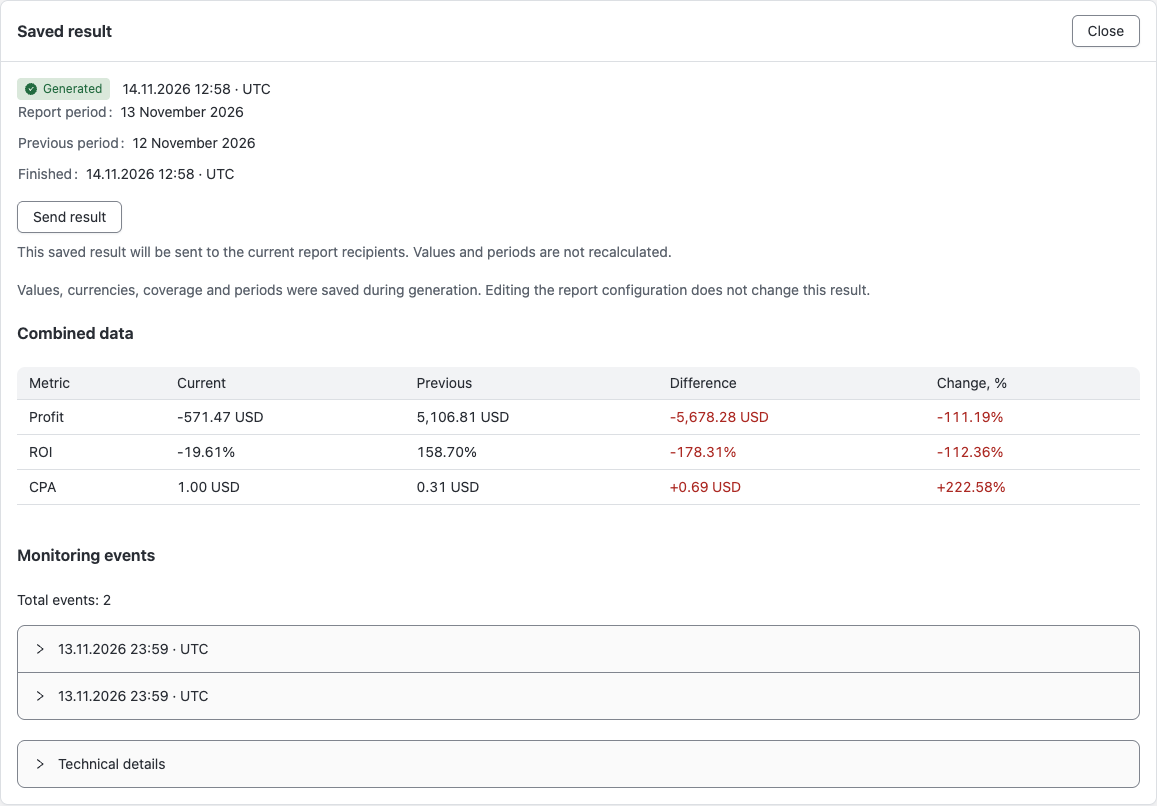
While a report is being generated, selecting generate again opens the same result. After completion, generating again creates a separate result. If a warning says it uses an earlier configuration, wait for completion and generate a report with the new settings.
Missing values are not replaced with zeros, and different currencies are not added together. A partial result can still contain useful data: check why individual groups are missing. Included observation events retain their original measurements; the report does not evaluate an old event again.
Saving settings, generating a report and sending it manually are separate actions.
Schedule and send
- Select Edit schedule and enable Send on a schedule.
- Choose the time and, where needed, a weekday or day of the month. The project's time zone is used.
- Save and check the next delivery date.
- Configure recipients and delivery channels.
Delivery uses the last period completed by that time. Choose Monday for the week that has just ended, or day 1 for the completed month. Sunday and day 31 still belong to the current period. If the selected day does not exist in a month, its last day is used.
Scheduled reports are sent automatically when complete or partial. After manual generation, select Send result to send the selected saved result without recalculating it. If a manual request opens an already running scheduled report instead, that report will be sent automatically.
Results that are still being generated or have failed cannot be sent. Generate a new report if the selected result is too old to send.
Set recipients
Under Recipients, choose team members, set Notify the owner and select delivery channels. Select Save recipients.
If no channels are selected, delivery is not restricted to particular channels: each recipient's connected channels are used, including verified and enabled email. Selecting specific channels limits delivery to them; it does not connect those channels for recipients. Recipients need project and statistics access and a connected channel. For messengers, check the Reports category in the bot.
To disable all delivery for this report, turn off Notify the owner, deselect other recipients and save. The owner still receives system notifications. To stop only scheduled deliveries, turn off the schedule.
Check delivery
A message saying the send request was accepted does not confirm that the report has arrived. If delivery is delayed, check channels, permissions and recipient warnings.
If a report is not ready or will not send
- After a save error, correct the marked fields, metric groups or observations and save again.
- If data is missing, check sources and the period. Refreshing data does not remove the plan's history restriction.
- If the time zone changed during calculation, generate the report again. The schedule can take up to 15 minutes to update after a time zone change.
- Archived or disabled projects do not send scheduled reports. Check the project's state.
- If an action is unavailable, read the reason. Viewers can read reports but cannot edit or generate them.
For a connection failure, follow the error instructions.
Delete a report
Delete report permanently removes its settings and all saved results. Turn off the schedule to pause deliveries temporarily.